

GuitArchitecture

Poking around the web looking at guitar blogs and stuff (I know…) I stumbled across a site called GuitArchitecture, and ended up spending like an hour reading all the stuff there. The posts were all really insightful, informative and – and this is what I love about it – rational. It just all makes sense, and he covers everything from practicing to theory and improvising to all sorts of gear I totally don’t understand (pods and laptop related stuff that has nothing to do with classical or flamenco, but it’s still interesting). I’m not doing it justice, but I really think it’s a brilliant site.
Then it turned out the guy behind GuitArchitecture was none other than Scott Collins – we were at Berklee together and I knew his wife, Candace, who’s been in the flamenco scene for a while and is a mean trumpet player. But we move in different circles, so I never knew Scott was such a guitar-ninja or sensei or whatever you want to call it. Anyway, I got in touch with Scott and we’re going to be featuring some of his GuitArchitecture posts here on a regular basis because I think they’re brilliant. Poke around his blog (where you can also find out where to catch him live) or come back here to see some of what he’s writing and some of my favorite posts of his.
In the meantime, here’s part 1 of his series on practicing – if it seems very fundamental stay tuned for more (and don’t be fooled – that fundamental stuff is, well, fundamental).
PRACTICE MAKES BETTER AKA PRACTICING PART I
Posted by GuitArchitecture on April 21, 2010
Probably the most commonly asked question of guitar teachers is some variant of, “How do I get better at (insert topic here)?” – which invariably leads to an answer of “practice”. If you are a rock guitarist like me, you probably won’t get much (if any) further clarification on this point as many instructors I’ve come in contact with don’t have an understanding of practicing other than repetition. Since practicing is such an absolutely vital step in gaining instrumental proficiency, it seems odd that proper practicing methods for guitar are misunderstood by so many.
There are a number of reasons for this. Speaking from personal experience, I do not come from a classical background. This is important to note because when you play an unamplified instrument in a concert hall (like a classical guitar) you need to make sure that you know how to project the sound, and that requires a specific focus on areas like proper technique, tone production and repertoire. So typically from the get-go there is a concise emphasis on technique and repertoire and typically some level of addressing what and how to practice.
As someone who learned a lot by trial and error – with the emphasis on error – it’s really only within the last four years of teaching that made me go deep into practicing methodology. What follows is a series of observations on optimising the practice experience.
There are really two broad issues here – how to practice and what to practice. So the first series of postings will deal with the “how” of practicing – optimal performance issues and methodologies and then delve into the “what” to practice.
**Note: some of this may seem excessively rudimentary, but greatness is in the details. And if you’re striving for greatness it’s best to address some details early.
The First Prerequisite: The Guitar
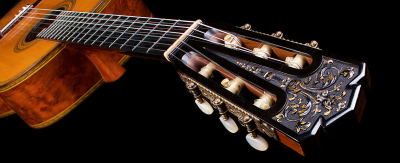
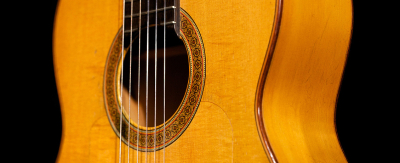
Before examining any of the methodology of the text it is important to note that all of the material presented here is dependent on a useable instrument. It’s important to have a guitar in optimal playing condition.
If you have never had your guitar set up, or if you are not familiar with how to set up a guitar, I recommend taking your guitar to a qualified guitar repair person and have the instrument professionally adjusted.
For people who play primarily electric guitar, I recommend playing everything you practice on an acoustic as well.
There are several reasons for this:
1. In playing acoustic, there are no effects to mask performance flaws. If your playing is sloppy, it is something that you will become immediately aware of, particularly if you are recording. Listening to a recording of an acoustic will reveal every unintentional open string, every choked note, finger squeak and other unintentional noise.
2. Acoustic strings are typically heavier than electric strings. Playing acoustic guitar with proper technique will build strength and endurance that will make playing electric guitar much easier.
3. For the most part, any technique that you develop for electric guitar should be something that can be performed on acoustic guitar. It can be a humbling experience at best (and an ego shattering one at worst) to shed a hot lick on electric, think you have it down and then crash and burn when you try to play it on acoustic. I’ve seen this happen numerous times on unplugged shows and it’s always grim.
The Second Prerequisite: Practice Materials
There are several things that I would recommend to have with you when you practice.
1. A metronome or time keeping device. It’s VERY important to practice with a time keeping device. If a metronome doesn’t work for you, use a drum loop or have someone record percussion for you. If you practice out of time, you will play out of time.
2. A tuner. Ultimately it’s a good goal to be able to fine tune accurately by ear or by pitch, but since this skill can take a while to acquire, it’s a good idea to start with a tuner.
3. A note-book, notepad or (if using a computer) word processing application. This will be covered more in-depth later, but it’s important to be able to write everything down.
4. A recorder. Try to get in the habit of recording parts of your practice session. It doesn’t need to be a brilliant hi fidelity recording. You could use your cell phone as a recording device and probably record some video as well. The recording quality just needs to be something audible that you can review. In addition to being able to hear your performance. It can help you get used to the sound of your playing. If you get more into recording later, it will be less stressful, as you will have already had a lot of experience.
5. A guitar strap. Properly adjusted. (This step assumes you are playing a steel string guitar – nylon string classical guitar style has its own set of rules for proper guitar body placement when playing and performing. The point of this step is to have the guitar sit consistently on your body when practicing and performing.More on this later).
6. A comfortable chair (if you’re sitting).
7. A timer. Like an egg timer or a kitchen timer.
8. Goals. More on this later as well, but it’s important to have a very clear goal of what you’re trying to achieve. There are some goal oriented links and observations here.
Most of this can fit in a guitar case and set up in about a minute. The key is to not make any part of this an ordeal. If something is difficult, you’re probably much less likely to do it.
The next practice post will address posture, muscle memory and some other interesting ideas.
In the meantime, if you haven’t been doing so already make sure to warm your hands up with light stretching before strenuous play. There’s some basic overview information here, but it’s also worthwhile to mention that not everything on the internet is accurate or useful. So if you research something online and try to apply it and it hurts – STOP IMMEDIATELY.
This will be a good reminder for me to go over warm up routines in a future post.
I hope this helps!
© Scott Collins – All Rights reserved – used here with permission.
1 comment